|
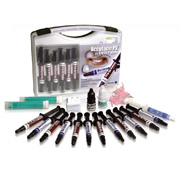
This is a specific procedure which utilizes Accolade PV’s unique Try-in composite (patent pending). To obtain the absolute maximum try-in time, use the directions that are in the Accolade PV kit. In those directions, no light curable bond is placed on the silane. Instead only Accolade PV Try-in is used and then later mostly removed by mixing with Prelude #2. That procedure is excellent but I choose to use my Clearfil Photo Bond routine here, due to its long track record and dual-cure, but I do sacrifice some try-in time. 1. Before trying in the veneer, apply a silane [Rely X (3M), S-Bond (Danville)] to the uncontaminated, fluoride etched veneer. Follow the silane manufacturer's instructions (sometimes an acid wash is necessary with the particular silane but not with 3M or Danville, a great convenience). Next, coat the silaned veneer with an unfilled, light curing, “enamel- bonding" resin [Enamel Bond (3M), Visar Seal (DenMat), or E-Bond (Danville)]. Don't cure. Avoid dual cured resins, especially Photo Bond, for this step in substitution for the light cured one since they may cause premature composite setting problems. The silane is now "locked in" by the unfilled resin and is permanently attached, unless dissolved in solvents such as alcohol. 2. Try the resin coated porcelain veneers for fit both individually and in adjacent groups on the unetched teeth. The unfilled resin protects the silane from contamination. After try-in, just brush off the resin with a dry brush, if contaminated, and brush on fresh resin. (In extreme cases, ultrasonically clean the veneer in ethyl alcohol and begin again with the silane step.) 3. Choose the desired shade of Accolade PV Try-in composite and place on inside of veneer to check shade on unetched tooth. [If you are not using Accolade PV, you will need to follow the manufacturers directions for try-in paste, especially noting how it is removed after try-in.] I usually try-in Accolade PV Try-in “Translucent” shade first; it is acceptable about 90% of the time. If the color needs to be modified, remove the veneer. Just wipe off the first try-in composite with a clean brush and change to the new shade. Try-in again. I find that when the first try-in does not produce an acceptable shade, slight white opaquing is usually needed (the tooth shows too much). Accolade PV has two excellent pre-opaqued whitish "veneer shades", Light and Extra Light, which greatly simplify this procedure. They usually eliminate the need for a custom mix. One of these two shades nearly always produces an acceptable try-in when the Translucent does not. In the rare event that the veneer needs darkening, just use a dark shade of flowable composite or the Accolade Brown or Yellow shades, or perhaps a blend of these. In addition to the 5 PV shades, Accolade PV has a White Opaquer shade that is intended for custom blending. It is the “super white and opaque” blending shade used at Danville to produce Light and Extra Light PV shades. Especially to be avoided for veneers are relatively high viscosity composite resins. They require excessive pressure to seat the veneers (veneer cracking problems), easily tear and form bubbles (black staining problems later). 4. Isolate, when necessary, with retraction cord [Ultradent #0 cord preferred], immersed in Visine if necessary for hemostasis. (Visine will not form a black sulfide stain at the margin like Astringident and other ferrous sulfates do.) 5. Clean try-in resin off the enamel surfaces, using pumice in a rubber cup. Avoid gingival contact to prevent bleeding. A Kincheloe “Retract” instrument (Danville or Tin Man) is a handy way to protect and retract the gingival tissue. Rinse with water and dry with oil-free air. 6. Brush at least 50% or Accolade PV Try-in composite off veneers and replace with the fully catalyzed Accolade PV. 7. Isolate teeth to be veneered with interproximal strips to protect adjacent teeth (not being veneered) from the etchant. 8. See next step if using a self-etching system such as SE Bond or Prelude SE. Otherwise etch tooth, wash and dry (assuming Photo Bond is being used). 9. Place a thin coat of Photo Bond on the etched tooth. If the prep is all or mostly all dentin and the veneer is fully light curable, then you may use self-etching SE Prime, then SE Bond, rather than etch and Photo Bond. Also Prelude SE works well. Note that with SE Bond, everything must be cured at once; no pre-curing of the SE Bond is permitted since it thickness would preclude proper veneer adaptation to the tooth. Prelude SE, being much thinner, may be light cured in advance of placing the veneer if care is taken to prevent pooling (air thin before curing). 10. Remove matrix strips prior to placing veneers on teeth. This step assures complete and passive seating of the veneers, even in multiples. 11. Gently place the veneers on the tooth, preferably all at the same time, and tack in center with small curing light perpendicular to facial surface, avoiding the margins. (The 3 mm diameter Demetron tip is ideal and takes 2-3 sec to spot cure.) After tack has fully cured, cure the other margins for about 1-2 seconds. Remove the resulting "jello" using a curette. Slide a metal matrix band mesial and distal of one tooth at a time and cure. The metal bands should be placed at the mesial and distal contacts of each tooth individually, preventing difficulty due to additive thickness of more than two bands at a time. To be avoided is placing a matrix prior to placing the veneer on the tooth. Pressure from the matrix will push on the veneer, forcing compensating seating pressure which results in broken veneers. If absolutely necessary, plumber’s teflon tape makes a good matrix. 12. Cure the entire veneer fully (slowly at first) with the matrix bands removed. Avoid high intensity lights such as PAC lights unless you desire the look of "characterized", cracked veneers. 13. Finish gingival margin resin flash with a "new" twelve fluted carbide bur (usually a 7901), if necessary, and finish interproximal with G-C New Metal strips 600 grit (GC Dental). For the gingival margin areas, Danville’s Stainbuster (Flashbuster) also works very well to remove any excess composite with no risk of damage to the veneer. 14. Polish exposed margins using thin, flexible polishing discs. Diamond "Flexis" disks (Vident) work well when it is necessary to trim or reshape the porcelain. Use rubber porcelain polishing cups/points such as Brasseler's "Dialite" cup and wheel to polish the porcelain.
|